Managing Organisations
Organisations are a way of linking multiple user accounts so they can access each other's tickets. Organisations can be set up and managed by both users and operators.
Organisation Access Levels
An organisation works on a two-tier access level system.
- Managers - Can control permissions within the organisation, and also view and reply to tickets created by their colleagues.
- Users - Can open tickets on behalf of the organisation, but only view and reply to tickets that they create.
The user who creates an organisation (or the first assigned user by an operator) is automatically the owner of it. The owner cannot be removed from the organisation or downgraded from a manager and only they can delete the organisation. Ownership can be transferred to another member in the organisation.
Searching for Organisations
Table Sorting
By default the table is sorted alphabetically by the organisation name. Once the table has loaded you're able to change the sort column by clicking the up/down arrows:
- Down arrow: descending order
- Up arrow: ascending order
Filtering the Table
It's possible to filter organisations based on a number of conditions:
- Visit Users -> Manage Organisations and click "Filter Results".
- Select the condition you wish to filter by, the filtering operator such as 'Is', 'Is Not' or 'Contains', and the value to filter by.
- Click 'Update' to update the results in the table.
Creating or Updating an Organisation
- Visit Users -> Manage Operators. If you're creating a new operator click "Add Operator", or if you're updating an existing operator, find the operator and click the edit (pencil) icon on the right side of the table row.
-
Complete the form fields (all fields are optional unless stated):
- Name - The organisation name, required.
- Country - The default country for the organisation. This option will be selected for new users added to the organisation.
- Language - The default language for the organisation. This option will be selected for new users added to the organisation.
- Timezone - The default timezone for the organisation. This option will be selected for new users added to the organisation.
- Notes - Allowing you to save additional notes for the organisation. This field is operator only, not visible on the frontend.
-
Domains - Organisation domain names allow you to automatically associate new users with the organisation based on their email address. For example, entering 'acmecorp.com' would mean if we receive an email from 'newuser@acmecorp.com' then the user would be automatically added to the organisation without needing to manually handle it later.
The email must match the domain name exactly, for example if you set 'acmecorp.com' and an email comes in from 'john@abc.acmecorp.com' then it wouldn't match. In this case, the subdomain should also be added to the list.
- Custom Fields - A list of your organisation custom fields will be shown here.
- Click "Submit" to save.
Deleting an Organisation
Deleting an organisation will remove all users that are currently members of it, and those users will no longer be able to share ticket access as before.
To delete an organisation, follow the below steps:
- Visit Users -> Manage Organisations.
- Find the organisation you would like to delete in the table (see Searching for Organisations).
- Click the delete icon located on the right of the table.
- Click on the left button, "Yes, Delete Organisation", that pops up confirming you would like to delete this organisation and it will now be deleted.
Merge Organisations
You can merge user organisations together, for example merging a duplicate organisation account into an existing organisation account.
To merge organisations, follow the below steps:
- Visit Users -> Manage Organisations.
- Find the duplicate organisation that you'd like to merge into another account (see Searching for Organisations) and open their profile.
-
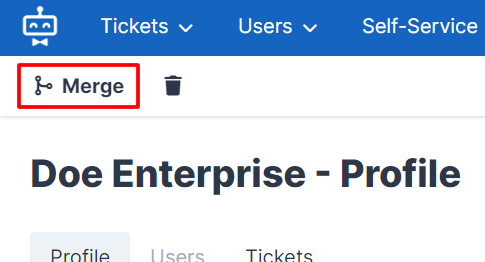
Click the "Merge" button at the top.

-
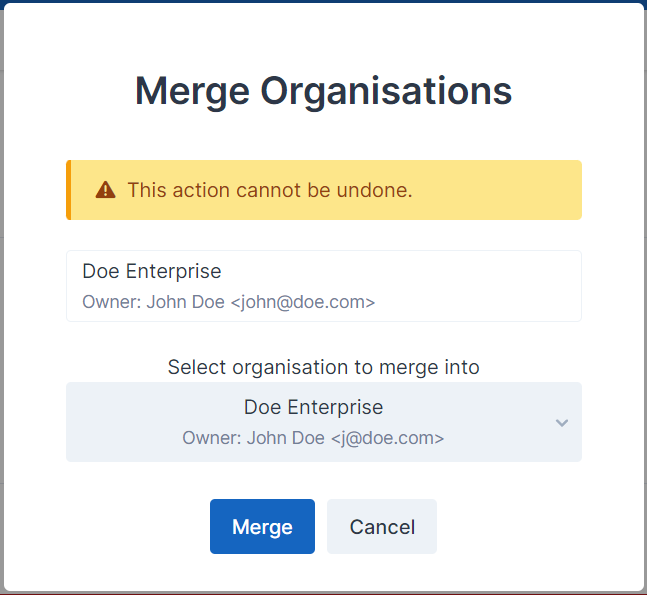
Search for the organisation you'd like to merge this organisation into.

- Hit "Merge" to proceed, you will be redirected to the merged user organisation profile once completed.
User data that is merged
Below is a description of all data that is changed when one organisation account (merging organisation) is merged into another organisation account (merged organisation).
| Data | Merge Result |
|---|---|
| User Organisation Profile & Notes | The merging organisation's profile data and notes will be lost. The merged organisation's profile data and notes will not change. |
| User Organisation Members | All members from the merging organisation will be moved to the merged organisation, retaining their access level (user/manager). |
| User Organisation Owner | The merged organisation will continue to be owned by the same user as it previously was. |
| User Organisation Domains | Domains from the merging organisation will be added to the merged organisation. |
Managing Users within an Organisation
Add User to Organisation
It is possible to add an existing user to an organisation, though note that it will remove access from their current organisation if they have one. New users can be added by selecting the company name while adding their account (see Creating or Updating a User).
To add an existing user to an organisation, follow the below steps:
- Visit Users -> Manage Organisations.
- Find the organisation in the table (see Searching for Organisations) and click on the name.
- Click on the "Users" tab.
- Click on the "Add User" button.
- Type the name of the user in the newly visible text field, and select the user when they show.
- Set the access level (See Organisation Access Levels) for the user.
- Click "Save" to submit the updated user list.
Remove User from Organisation
To remove a user from an organisation, follow the below steps:
- Visit Users -> Manage Organisations.
- Find the organisation in the table (see Searching for Organisations) and click on the name.
- Click on the "Users" tab.
- Find the user that you wish to remove and click the cross on the right side of the row.
- Click on the left button, "Yes, I'm sure", that pops up confirming you would like to remove this user and the user will now be removed from the organisation.
Change Access Level of User in Organisation
To change the access level of a user in an organisation, follow the below steps:
- Visit Users -> Manage Organisations.
- Find the organisation in the table (see Searching for Organisations) and click on the name.
- Click on the "Users" tab.
- Find the user that you wish to change.
- Set the access level (See Organisation Access Levels) for the user.
- Click "Save" to submit the updated user list.
Transfer Ownership of Organisation
You may need to transfer the ownership of the organisation, if for example a user set up the organisation in the system and has later added the account for someone more senior in the organisation. See Organisation Access Levels for more details about the owner.
To change the owner, follow the below steps:
- Visit Users -> Manage Organisations.
- Find the organisation in the table (see Searching for Organisations) and click on the name.
- Click on the "Users" tab.
- Scroll down to the "Transfer ownership" section.
- Type the name of the user in the new user text field and select them.
- Click "Transfer" to make the change.
Please note that the option will only be available if there are at least two users in the organisation, and the new owner will automatically become a manager.
View Organisation Tickets
One of the benefits of an organisation is the pooling of tickets by users from the same organisation as they are often related. You can view tickets submitted by all users of the organisation, which may assist in resolving a later ticket.
To view all tickets in the organisation, follow the below steps:
- Visit Users -> Manage Organisations.
- Find the organisation in the table (see Searching for Organisations) and click on the name.
- Click on the "Tickets" tab.