AI Assistant
Improve the efficiency and productivity of operators with AI.
Prerequisites
The AI Assistant plugin requires the following:
- SupportPal version 6.0.0 or higher.
- An API key for a supported AI provider.
- An API key for a supported vector database.
AI Providers
AI providers are used to access LLM and embedding models. This section guides you through configuring each provider for use with the AI Assistant.
The following providers are currently supported:
Anthropic
To set up an API key, follow these steps:
- Login at Anthropic Console, or sign up if you don't already have an account.
- Browse to API keys.
- Press the "+ Create key" button.
-
In the popup modal, enter appropriate values for the fields:
- Workspace: Default
- Name: SupportPal AI Assistant
- Press the "Add" button.
- Make a note of the API key for later when you're configuring the plugin settings.
Gemini
To set up an API key, follow these steps:
- Login at Google AI Studio, or sign up if you don't already have an account.
- Browse to API Keys.
- Press the "Create API key" button.
-
In the popup modal, enter appropriate values for the fields:
- Name your key: SupportPal AI Assistant
- Choose an imported project: select an imported Google Cloud project, or opt to "+ Create Project"
- Press the "Create key" button.
- Make a note of the API key for later when you're configuring the plugin settings.
Ollama
Ollama is an open-source tool which lets you run large language models directly on your own device. To get started on your device, follow their quick start guidance.
OpenAI
To set up an API key, follow these steps:
- Log in at OpenAI Platform, or sign up if you don't already have an account.
- Browse to the OpenAI settings page.
- Browse to Billing within the sidebar organisation settings and fund your account. It's important that your account is funded and in at least usage tier 1, otherwise you may encounter errors when using the plugin.
- Browse to API keys.
- Press the "Create new secret key" button. You may need to verify your phone number if you haven't already done this.
-
In the popup modal, set the fields as appropriate - for example:
- Owned by: Service Account
- Service Key Name: SupportPal AI Assistant
- Project: Default
- A new screen will appear with the key - make a note of that for later when you're configuring the AI Assistant.
Vector Database
Vector databases are used to efficiently store, index and retrieve unstructured data using mathematical representations. The following databases are currently supported:
Meilisearch
Meilisearch can be used either by running a local instance, or making use of their Cloud product. For guidance on installing Meilisearch please refer to running Meilisearch in production. Alternatively, make use of their Cloud product by registering an account at Meilisearch Cloud.
The below guide describes how to obtain an endpoint URL and API key when using Meilisearch Cloud. If you're using a self-managed instance, you can use the URL and API key that you set up for your instance instead, and skip the steps below.
- Sign up for a Meilisearch Cloud account.
- After logging in, follow the welcome guidance to create a new project or alternatively use the "+ New Project" button.
- Once the project has been created, browse to "Project Settings" and then further to "API Keys".
- On the "API Keys" page, you will find the endpoint URL, and your master key, both of which should be entered into your plugin settings.
Qdrant
The below guide describes how to obtain an endpoint URL and API key when using Qdrant Cloud. If you're using a self-managed instance, you can use the URL and API key that you set up for your instance instead, and skip the steps below.
- Sign up for a Qdrant Cloud account.
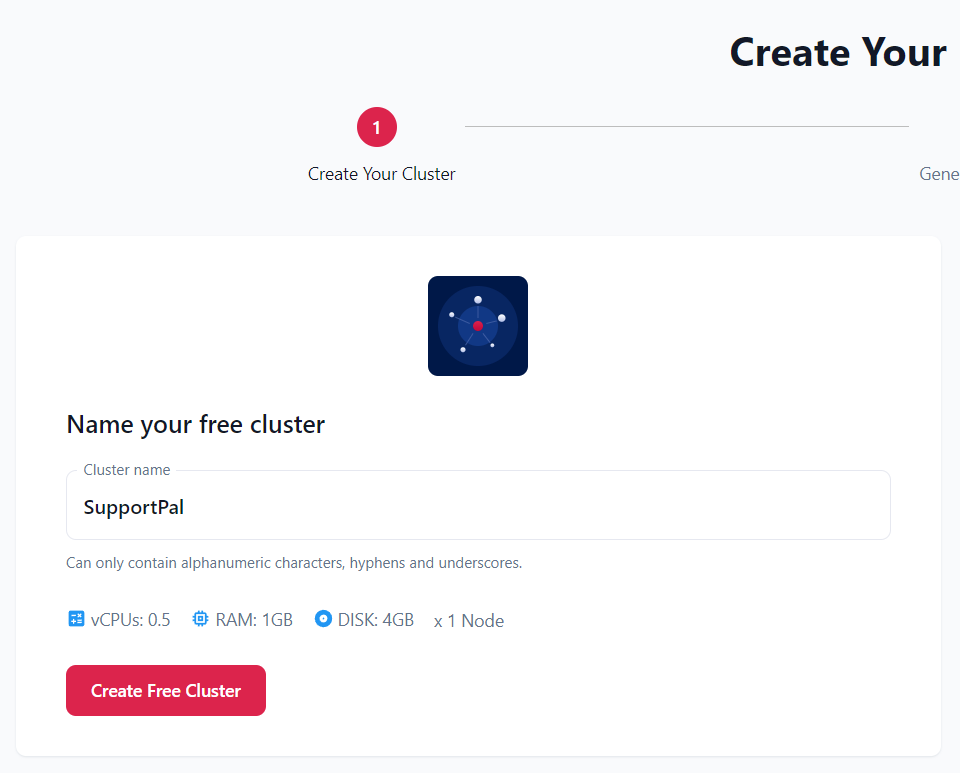
-
Once your account has been created, follow the steps to create a free cluster. Enter a name for your cluster and click "Create Free Cluster".
-
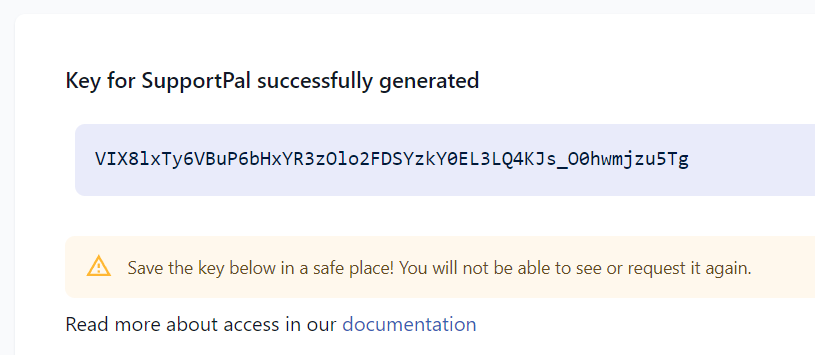
While the cluster is being created, click the "Generate API Key" button.
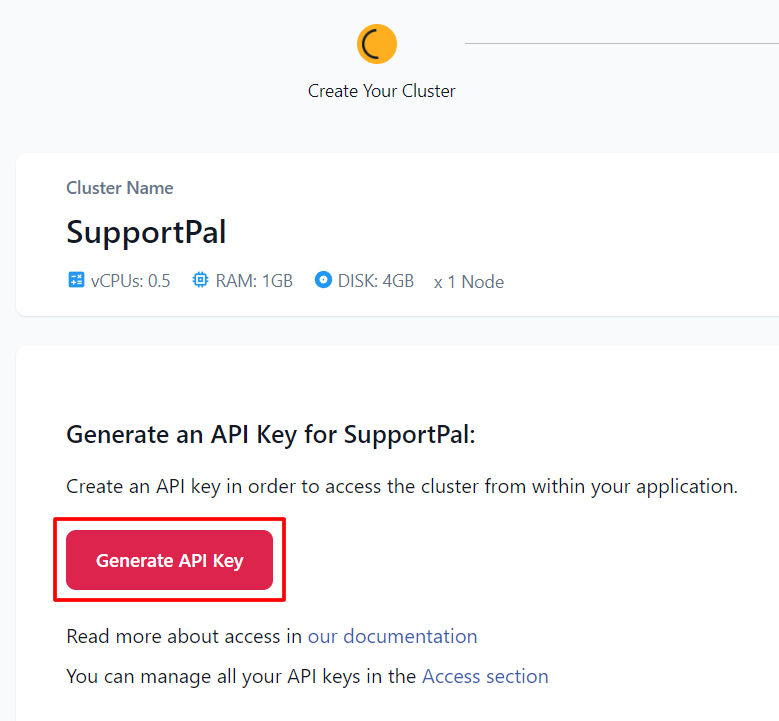
Make a note of the Vector API Key field value to input later into the settings.
-
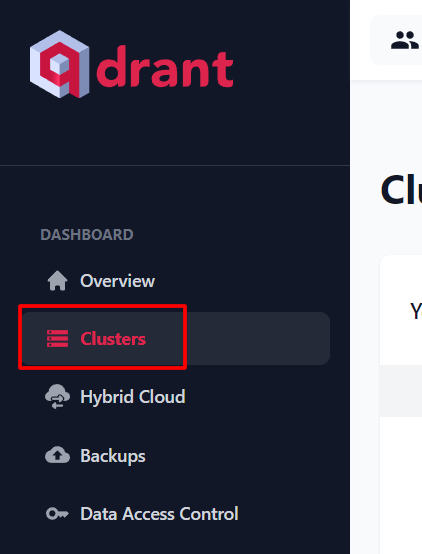
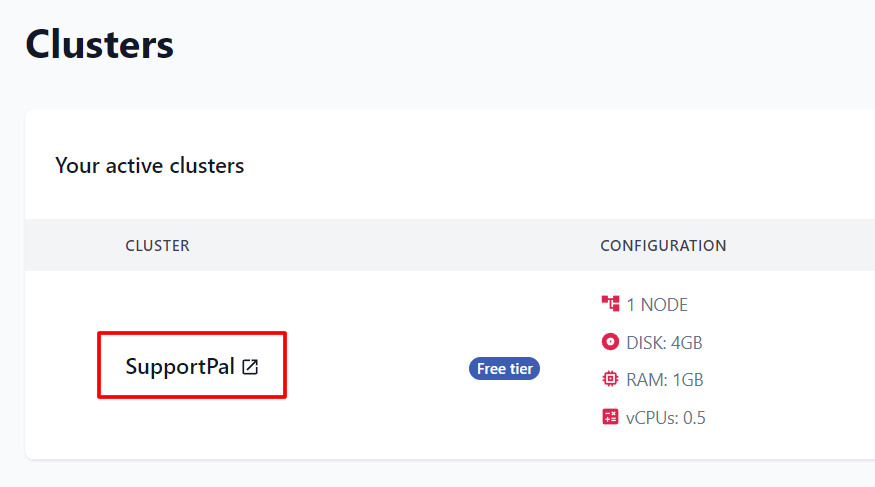
Once the cluster has successfully been created, click the "Clusters" link in the sidebar and then on the Cluster name.
-
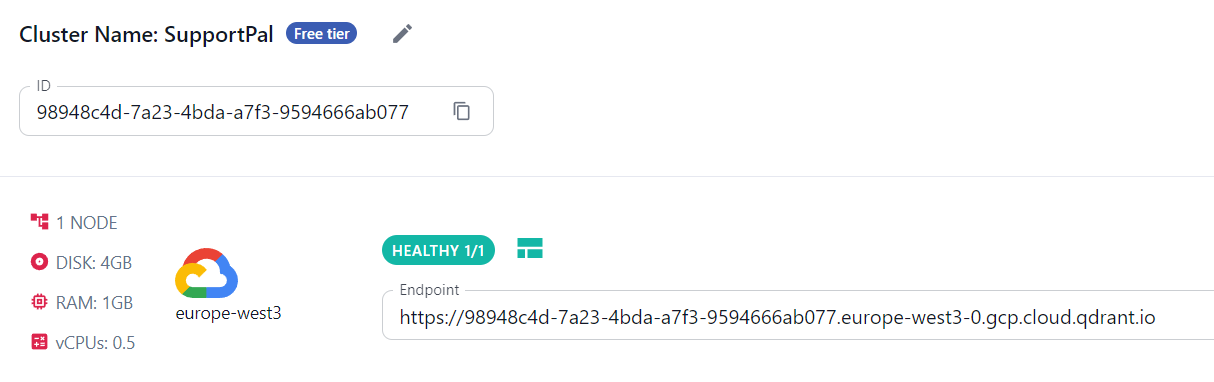
Copy the "Endpoint" URL to the Vector Host field in the SupportPal settings.
Activating, Deactivating and Uninstalling
To activate the plugin, visit Add-ons -> Plugins and click on 'Activate' under the AI Assistant plugin name. The plugin must not currently be activated.
Deactivating the plugin will stop it from functioning but keep your existing settings saved. To deactivate the plugin, visit Add-ons -> Plugins and click on 'Deactivate' under the AI Assistant plugin name. The plugin must already be activated beforehand.
Uninstalling the plugin will remove the settings from your system and also delete the plugin completely. We recommend to use the deactivate option instead, unless you have absolutely no need for this plugin. To uninstall the plugin, visit Add-ons -> Plugins and click on 'Uninstall' under the AI Assistant plugin name.
Configuration
To configure the plugin, visit Add-ons -> Plugins and click on 'Settings' under the AI Assistant plugin name. The plugin must already be activated beforehand.
Embedding Generator Provider
The embedding generator provider is used to generate mathematical representations of your content to store in the vector database. You can choose to use the same provider for both embedding generation and LLM, or you can choose different providers. For example, you may wish to use OpenAI's embedding model, and Anthropic for LLM functionality.
Select the provider that you wish to use, and then refer to the Vector Databases section above for guidance on setting up the provider and obtaining an API key.
Embeddings are model-specific, so switching providers or models requires a full resync of your vector database. Once chosen, changing your embedding model is time and computationally expensive.
Language Model Provider
The language model provider is used to generate and understand natural language. You can choose to use the same provider for both embedding generation and LLM, or you can choose different providers. For example, you may wish to use OpenAI's embedding model, and Anthropic for LLM functionality.
Select the provider that you wish to use, and then refer to the AI Providers section above for guidance on setting up the provider and obtaining an API key.
Persona
The persona is used to control the behaviour of the AI assistant, for example change the name, avatar and define business specific context to help the AI assistant make more informed suggestions.
Identity
Set a name and avatar for the AI assistant to help personalise the experience and quickly differentiate between AI generated suggestions and operator generated content.
Business Context
Use this section to tell the AI about your organisation. The more detail you provide, the better the AI can understand your business and respond in a way that reflects it accurately.
Consider including:
- Your company name, sector, and a brief summary of what you do.
- The specific products or services this AI will be helping with — avoid vague descriptions.
- A clear outline of what the AI should and shouldn't handle, so it stays within the right boundaries.
- Any internal rules or policies it needs to follow — such as refund timeframes, response commitments, or how queries should be escalated.
- Relevant details about your customers — for instance, whether you work with businesses or consumers, and whether your audience expects technical language or plain English.
Markdown content is permitted within the input fields and offers additional information to the LLM, but will not be rendered within the input field.
Communication Guidelines
Use this section to define how the AI should communicate with your customers. Setting clear guidelines here ensures every interaction feels consistent, on-brand, and appropriate for your audience.
Consider including:
- The tone and personality the AI should adopt — for example, formal and professional, or friendly and conversational.
- Any language or phrasing to avoid — such as competitor names, sensitive terminology, or internal jargon that customers wouldn't understand.
- How the AI should handle frustrated or unhappy customers — for example, whether it should always acknowledge the issue before offering a solution.
- Preferred response length and format — whether answers should be brief and direct, or detailed and explanatory.
- Any sign-off conventions or greeting styles that reflect your brand — such as how the AI should introduce itself or close a conversation.
Keep your instructions clear and concise — overly long or complex guidelines can confuse the AI and lead to inconsistent responses. Where possible, phrase instructions positively, describing what the AI should do rather than what it shouldn't. For example, instead of "don't use a casual tone", try "always use a professional and courteous tone".
Markdown content is permitted within the input fields and offers additional information to the LLM, but will not be rendered within the input field.
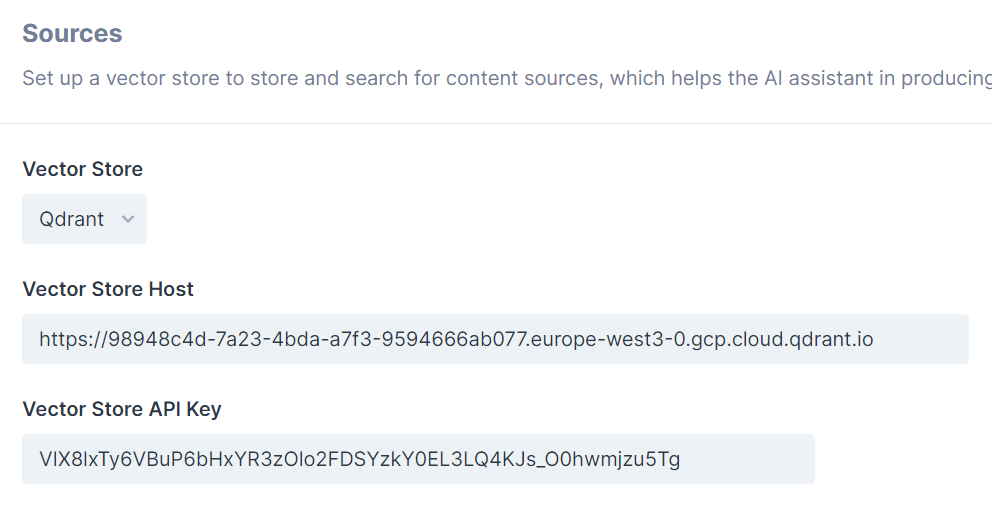
Sources
The sources are an important part of ensuring the AI assistant has the necessary context to make useful suggestions. A vector store must be configured and we recommend syncing as much of your content as possible.
Vector Database
The vector database is used to store and index the mathematical representations of your content, which the AI assistant can then search and retrieve to use as context when generating suggestions.
Select the vector database that you would like to use, and then refer to the Vector Databases section above for guidance on setting up the provider and obtaining an API key.
Content
- Tickets - The most important content to sync are tickets, we recommend syncing at least a year of ticket history. New tickets and messages are automatically synced when enabled.
- Websites - Crawl your websites, blogs, external documentation to help the AI Assistant. Once set, the crawler will run in the background and it may take some time for it to fully crawl the website. You can schedule a recrawl to index new pages that may have been added since you last crawled.
- Articles - If you have public articles, these can be synced to use this information when generating a reply. New and updated articles are automatically synced when enabled.
- Canned Responses - If you already have public canned responses set up to help with regular responses to tickets, these can be synced to use these when generating a reply. New and updated canned responses are automatically synced when enabled.
Features
Enable or disable optional AI features to tailor the AI assistant's behaviour to your workflow. These settings apply globally across all conversations.
Ticket Resolved Detector
When enabled, the assistant automatically analyses incoming customer replies (after a short delay, and with no further replies after) to determine whether the message is purely an acknowledgement or expression of gratitude - such as "Thanks, that's all I needed!" - with no outstanding questions or requests.
If the message is determined as requiring no further action, the assistant will close the ticket on your team's behalf, removing the need for manual follow-up. This helps keep your queue clean and reduces the administrative burden on your staff.
Ticket Priority Updater
When enabled, the assistant automatically adjusts the ticket priority based on the content of user replies. This is particularly useful when a user has incorrectly selected a priority or the priority increases/decreases as the conversation continues.
Using the AI Assistant
The AI Assistant is available in two places within the ticket view.
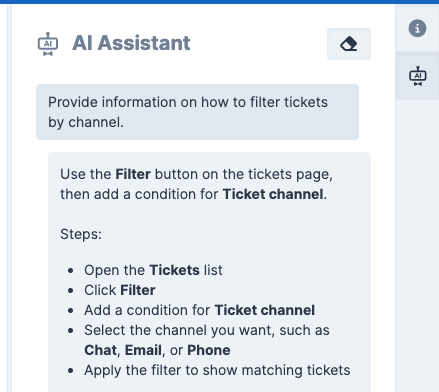
Context Panel
The primary way to interact with the AI Assistant is through its context panel in the context sidebar (right-hand side) of the operator panel. The panel includes a messages area and an input field where you can ask the AI Assistant questions.

The AI Assistant is conversational, with a few predefined commands. Each new question and answer becomes additional context, which helps you refine follow-up prompts. For example, you can ask it to generate a reply, then ask it to rewrite that reply in a different language.
Type your question in the input field and press Enter. The AI Assistant will then return a response.
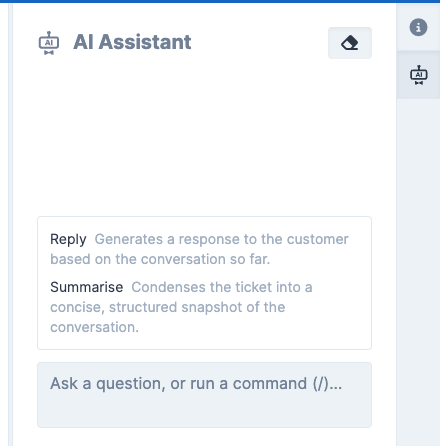
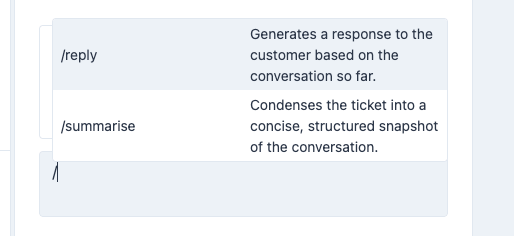
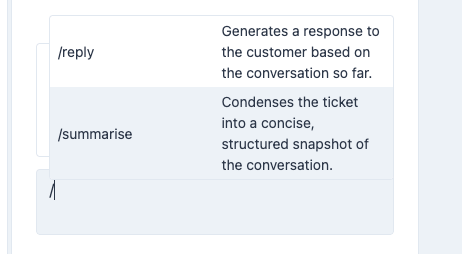
There are two built-in commands for tickets: Generate Reply and Summarise Ticket.
These commands are visible when there are no existing AI messages, or when you type "/" in
the input field.
Generate Reply
The AI Assistant can suggest a reply by using the latest ticket messages along with relevant context from previous tickets, websites, articles, and canned responses.
Type "/reply" to generate a suggested reply. Once generated, it will appear in the messages area.
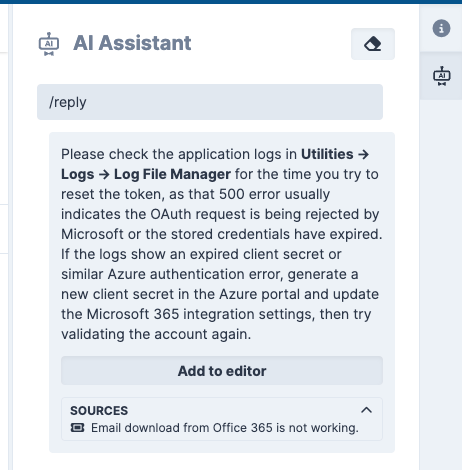
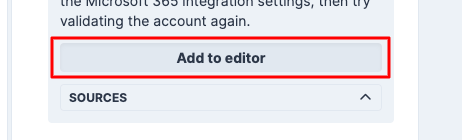
To use the reply, click the "Add to Editor" button at the bottom. This inserts it directly into the reply editor, where you can make any final changes before sending.
The sources used to generate the reply are shown, which can help you improve your content over time and produce better suggestions.
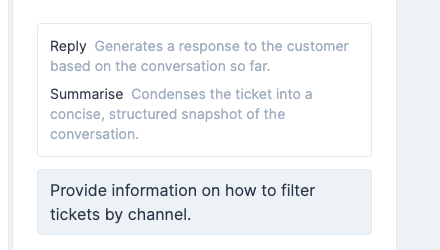
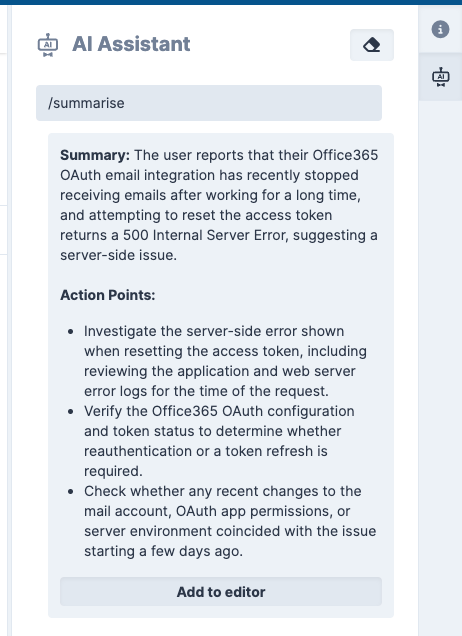
Summarise Ticket
The AI Assistant can provide a summary of the ticket contents. This helps you quickly understand the customer's enquiry and identify any actionable items without reading the full conversation.
Type "/summarise" to generate a ticket summary. Once generated, the summary appears in the messages area.
Editor Options
You can also use the AI Assistant from the editor toolbar. The toolbar provides two actions: Generate Reply and Enhance Reply.
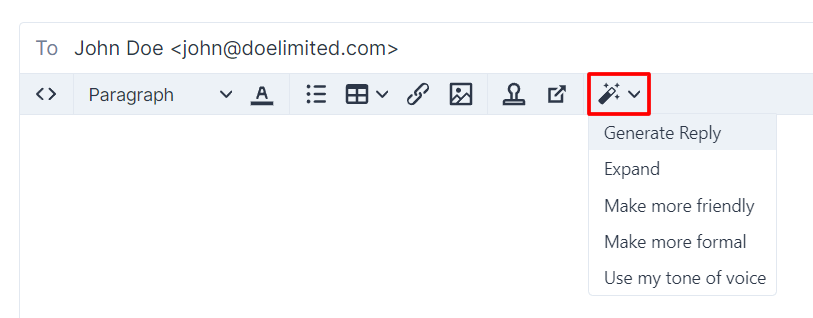
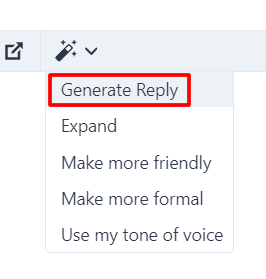
Generate Reply
To generate a reply from the editor toolbar, click "Generate Reply". Once generated, the response is inserted directly into the editor at the current cursor position.
Enhance Reply
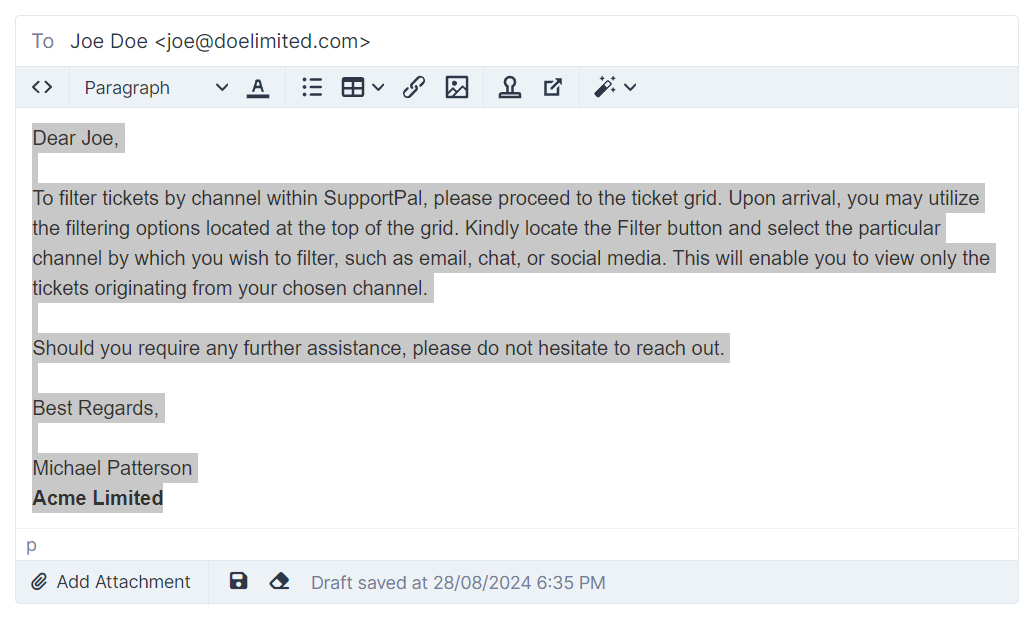
When writing a reply, the AI Assistant can enhance your message by improving spelling and grammar, adjusting tone, and more. This can improve response quality and make replies sound more natural.
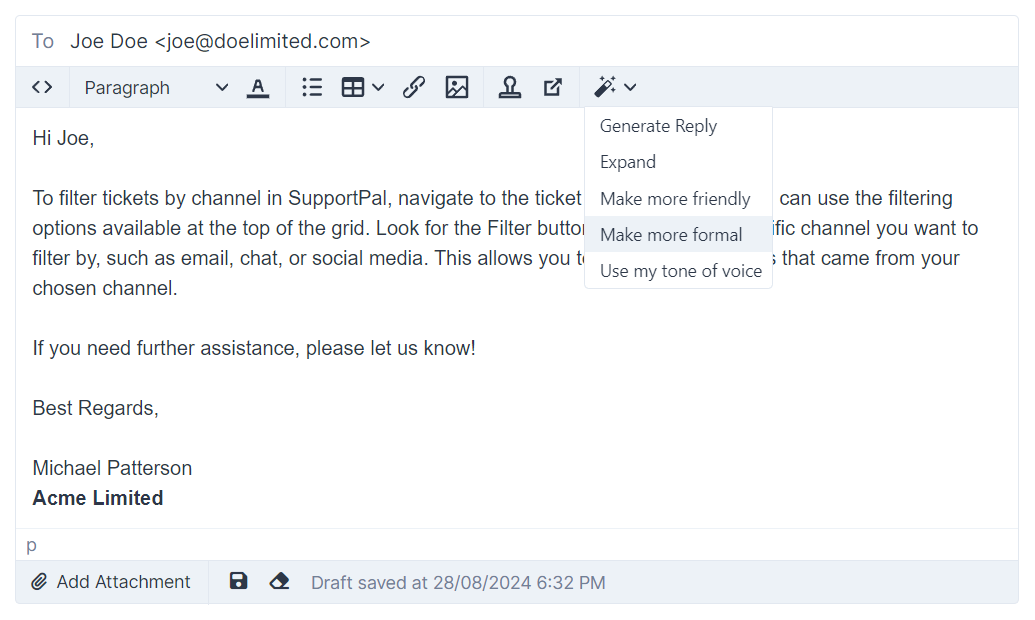
Using this option updates the entire editor content. If you are not happy with the result, you can undo the changes.