Google Translate
Translate foreign ticket messages using Google Translate with a single click.
Activating, Deactivating and Uninstalling
To activate the plugin, visit Plugins and click on 'activate' under the Google Translate plugin name. The plugin must not currently be activated.
Deactivating the plugin will stop it from functioning but keep your existing settings saved. To deactivate the plugin, visit Plugins and click on 'deactivate' under the Google Translate plugin name. The plugin must already be activated beforehand.
Uninstalling the plugin will remove the settings from your system and also delete the plugin completely. We recommend to use the deactivate option instead, unless you have absolutely no need for this plugin. To uninstall the plugin, visit Plugins and click on 'uninstall' under the Google Translate plugin name.
Settings
To configure the plugin, visit Plugins and click on 'Settings' under the Google Translate plugin name. The plugin must already be activated beforehand.
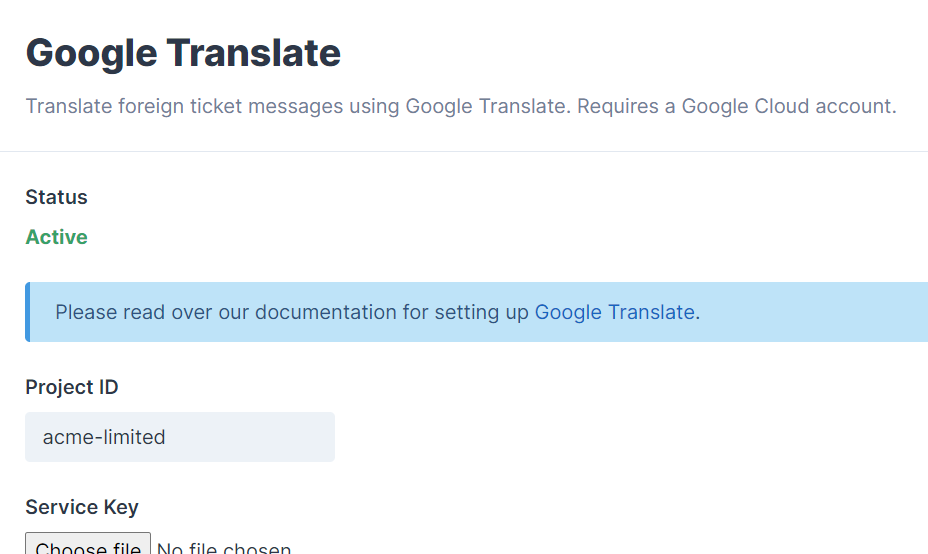
The project ID and service key must be set for the plugin to work, a Google Cloud account is required for this. Once you have an account or have set up the free trial, please follow the steps below.
- Visit the Google Cloud Platform website - https://console.cloud.google.com/home/dashboard - and sign in to your Google account.
-
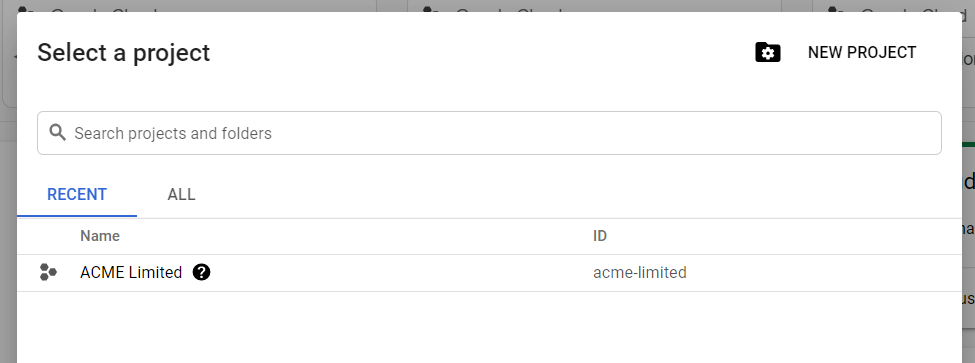
Click on the project selector and then select an existing project or click on "New Project".

-
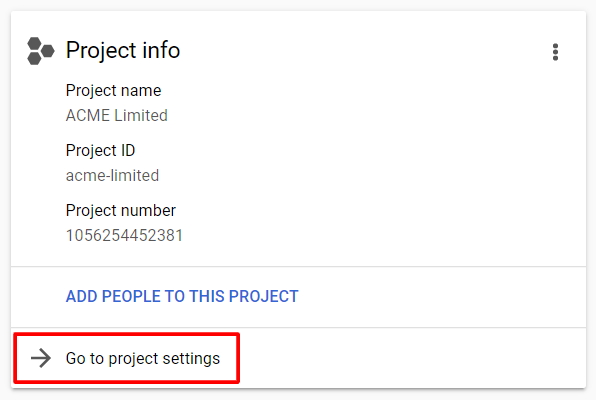
You will then see a box with your project info, copy the Project ID to the plugin settings page. Next click "Go to project settings".
-
Click the menu icon in the top left, then hover over "IAM & Admin", then click "Service Accounts" in the sidebar and then "Create Service Account" at the top.


-
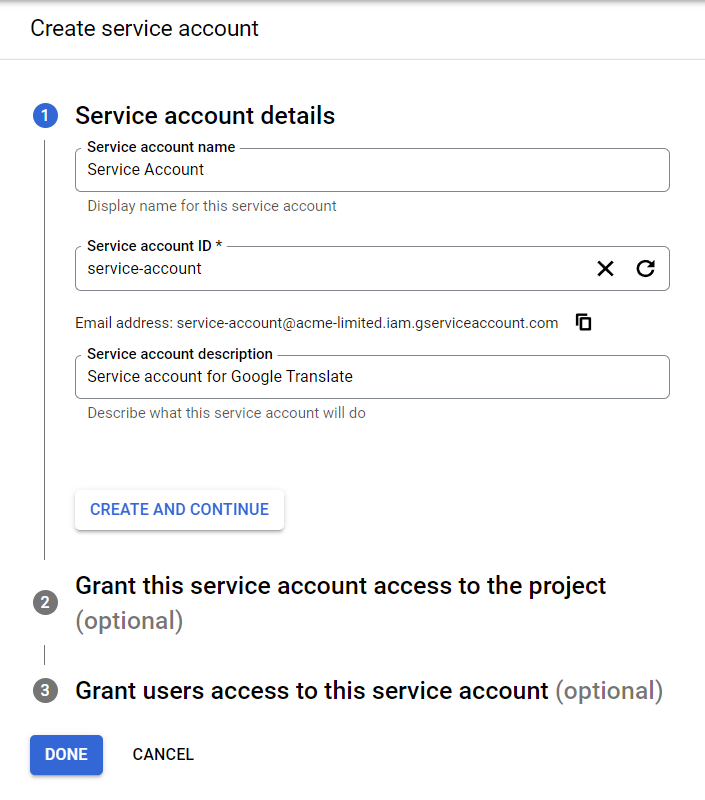
Set a generic name for the service account, it does not matter. This should automatically fill in the ID and then click "Create and Continue".
-
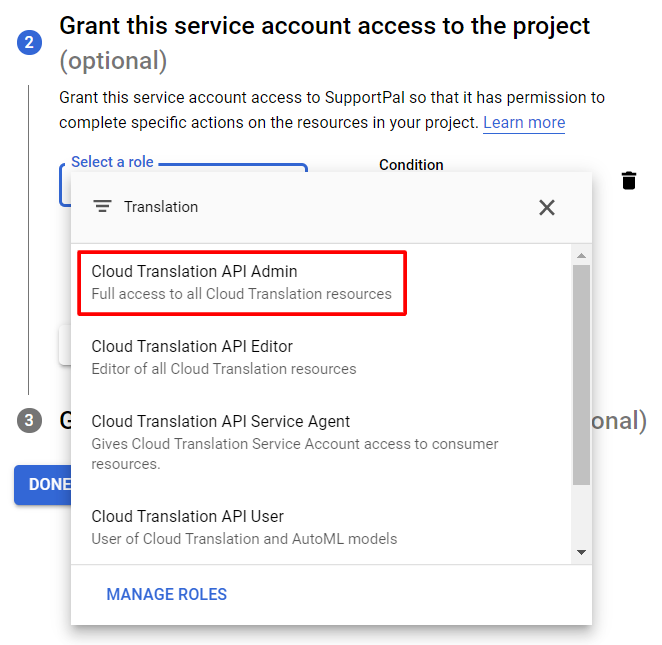
For the role, select "Cloud Translation API Admin" and continue.
-
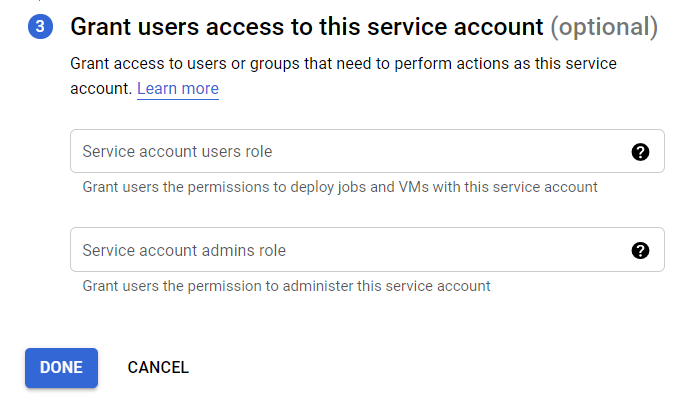
Leave the last step blank and click "Done".
-
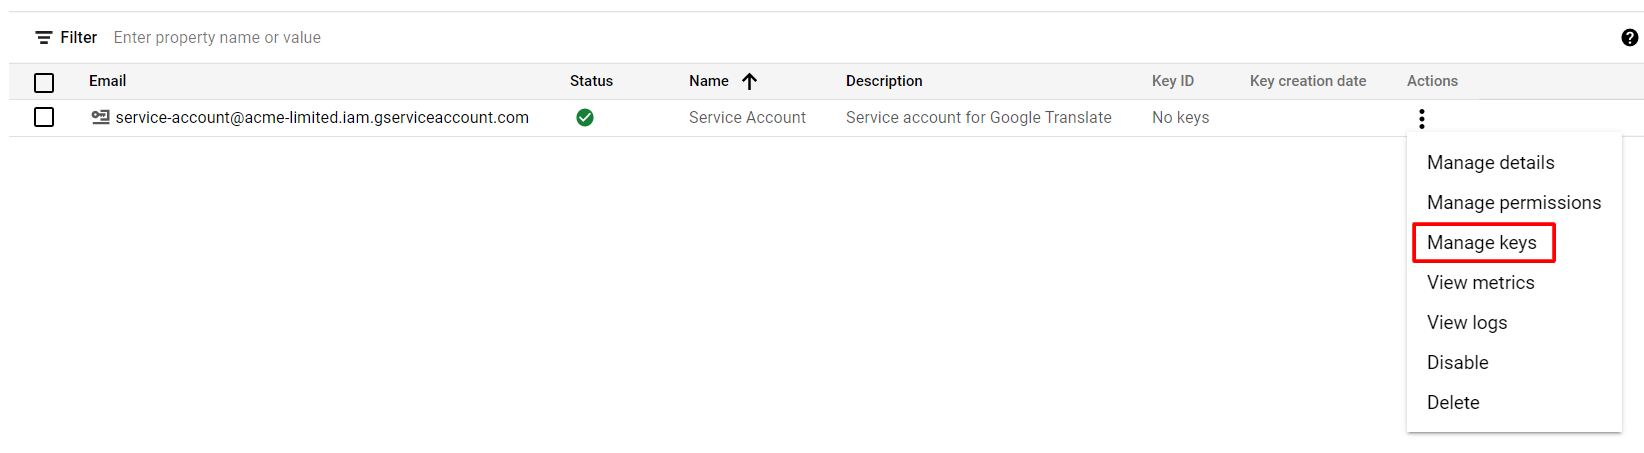
Once the service account shows, click the actions menu and then "Manage keys".
-
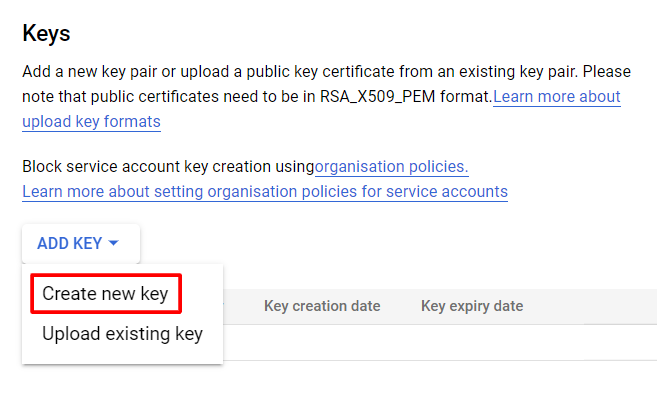
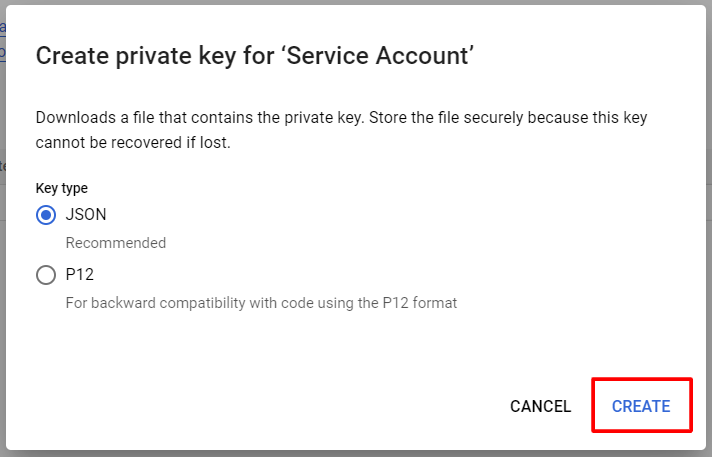
Click "Add Key" and then "Create new key".
-
Leave the key type as JSON and click "Create". A JSON key file will download to your computer and this is what must be used as the service key on the plugin settings page.
- Finally, visit https://console.cloud.google.com/apis/library/translate.googleapis.com and enable the Cloud Translation API for your project. This requires a billing account, which you may need to set up if you do not currently have one.
The additional following settings are available for configuration:
- HTML Mode - By default the plugin only translates visible text. Toggling this option will send the whole HTML message, which can produce better formatted results but the increased character count can lead to significantly higher costs.
Once you have set the project ID and selected the service key file, save the settings, and it should show 'Active' for the status if everything is working correctly.
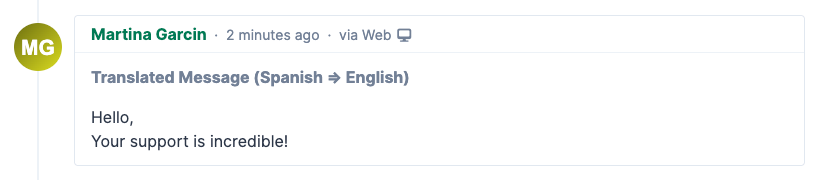
Translating Messages
Once the plugin is active and configured, a translation button will be added on each message to the left of the quote button in the ticket view. Click this to begin translating a message.
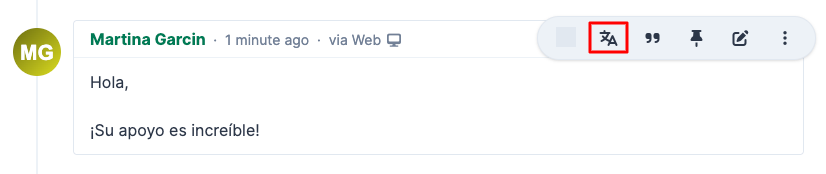
The translated message will show shortly. You can click the button again to toggle back to the original message.