
Facebook Channel
The Facebook channel can handle multiple accounts and will create tickets on new posts on your Facebook page and messages to the page.
Activate or Deactivate Channel
The Facebook channel is disabled by default and needs to be activated before use. To do this, go to Settings -> Tickets -> Channels and click the "Activate" link on the Facebook channel row. The channel can be deactivated in the same way, instead this time by clicking the "Deactivate" link on the same row.
Accounts
Setting up your Facebook Page For Access
To set up a Facebook page to work with the help desk, you need to set up an application with the right permissions, follow the steps below.
- Login to Facebook.
-
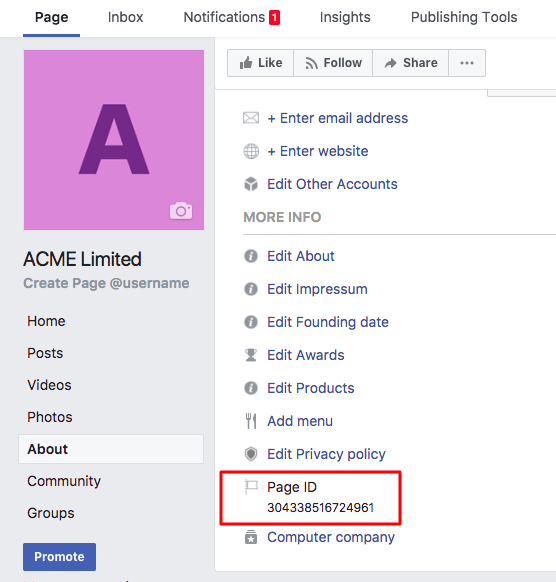
If you do not currently have a Facebook page for your company, please create a page and keep a note of the page ID. If you already have a Facebook page, you can get the page ID by clicking the "About" link in the sidebar, and scrolling down to the "Page ID" row. Your page must be published (publicly visible) for the integration to work.
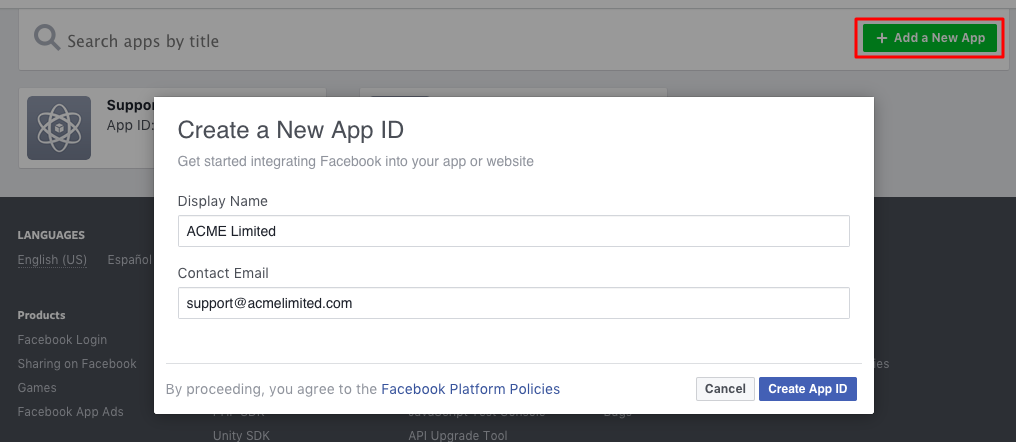
- Visit the applications page on the Facebook developers website - https://developers.facebook.com/apps - and click the "Add a New App" button.
-
Type in a name for the application, the name is not important, and click the "Create New Facebook App ID" button.
-
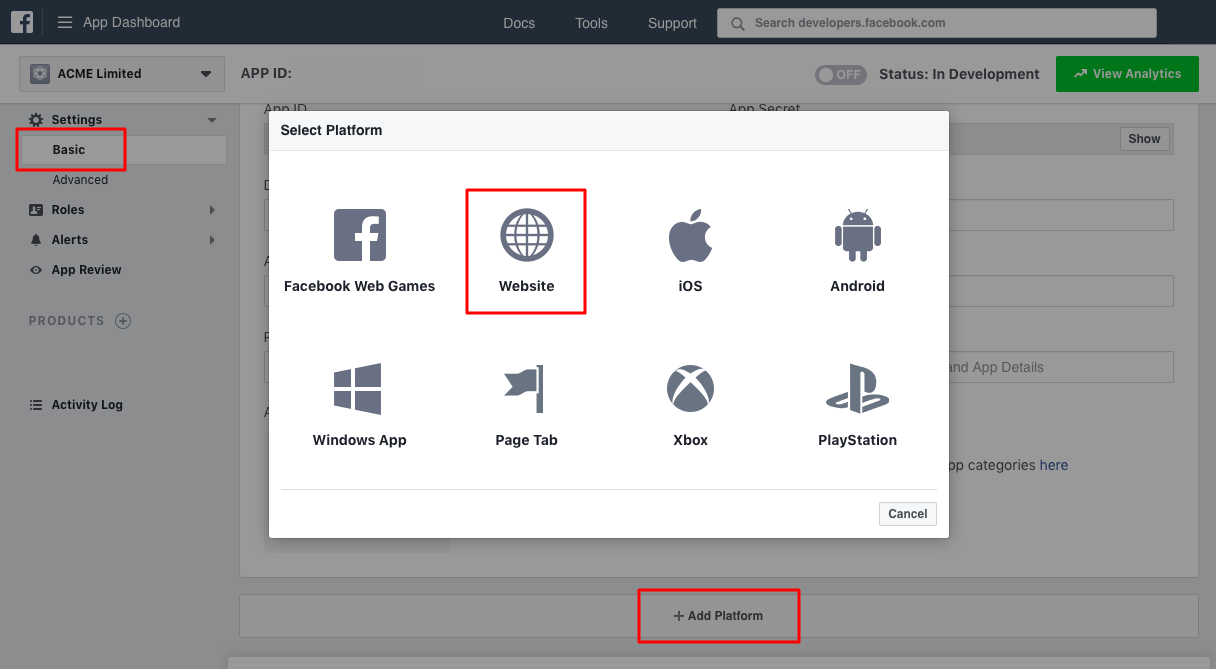
The screen will load with your new app. Click the "Settings" option in the sidebar and click the large "Add Platform" button. Click the "Website" option.
-
Enter the main domain for the help desk under "Site URL", and enter the same URL in the "App Domains" field above.
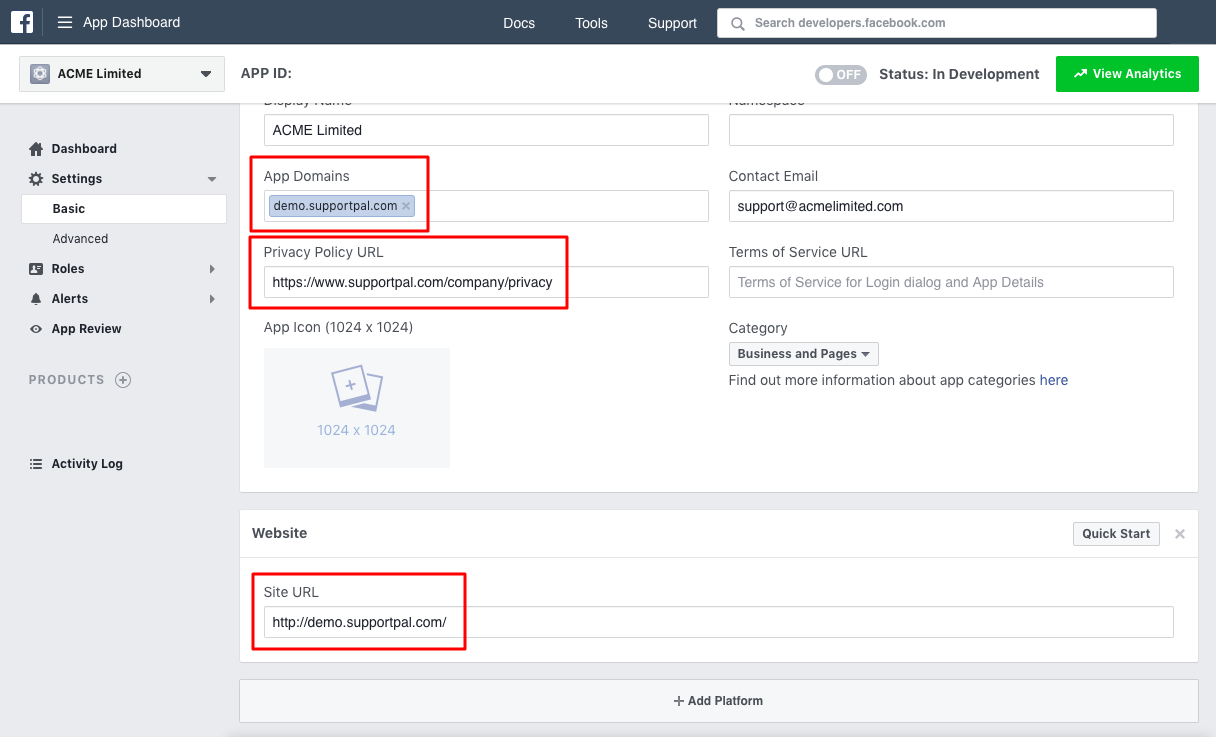
- Click "Save Changes."
-
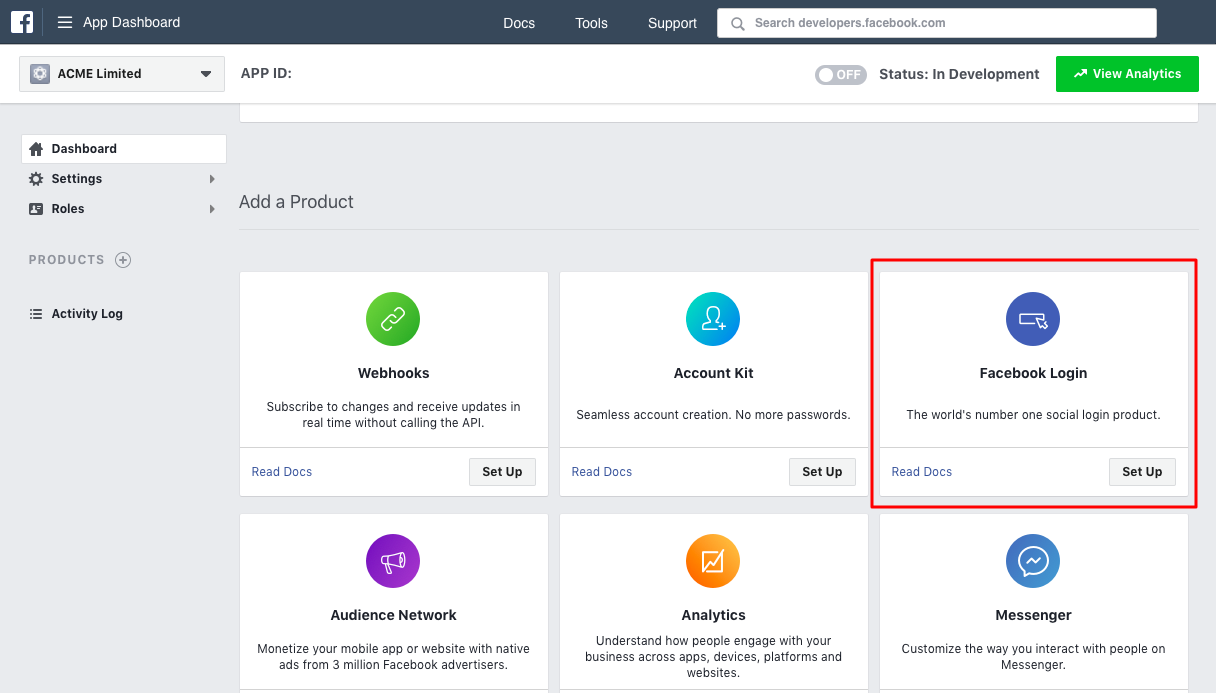
Under "Products" in the sidebar click "Add Product". Hover over the Facebook Login option and click on the "Set Up" button that appears.
-
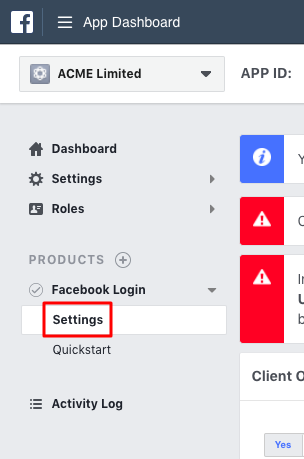
Click "Settings" in the sidebar under the "Facebook Login".
-
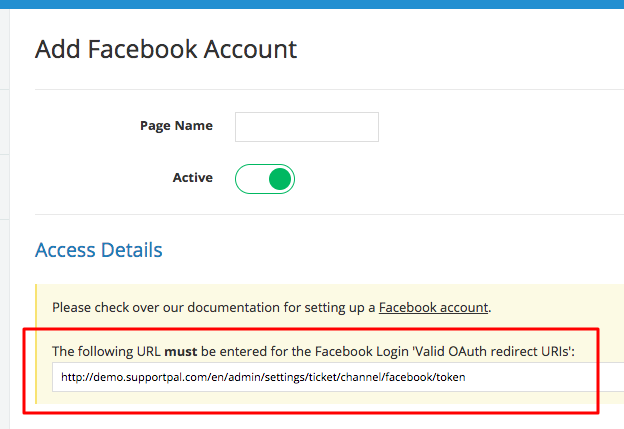
Find your token URL when you go to add/edit a Facebook account in the help desk operator panel, and enter this in to the "Valid OAuth redirect URIs" field.
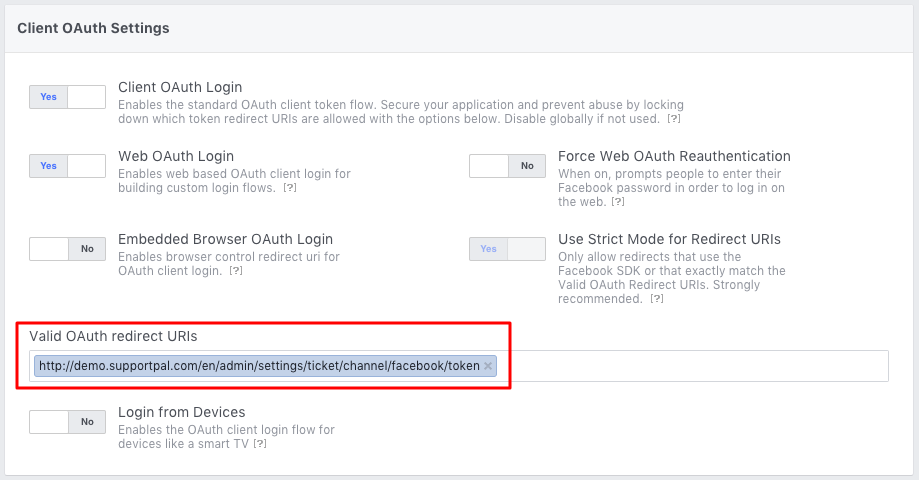
- Click "Save Changes".
-
Click "App Review" and toggle the option to make the application public, follow the steps shown.
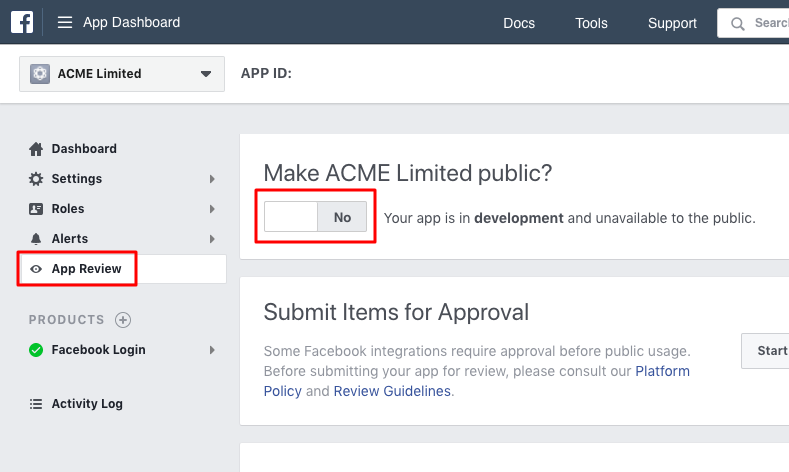
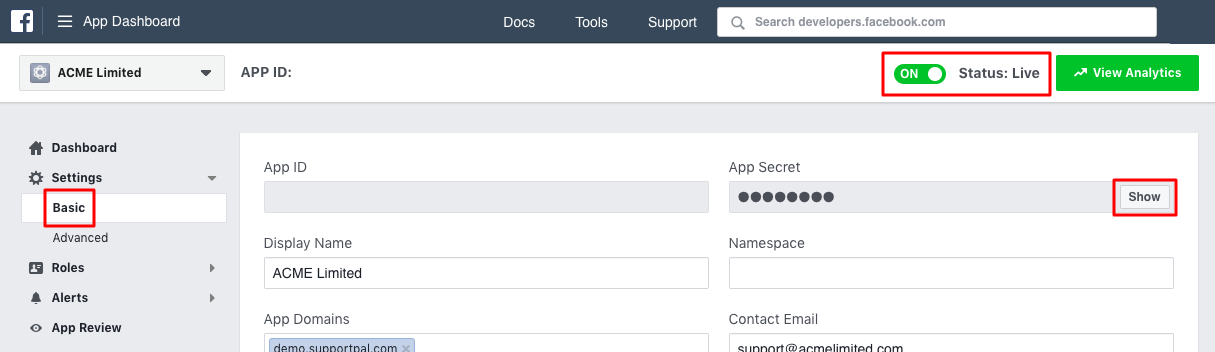
Finally go back to the settings, you now have everything needed to set up the account in the help desk. The important details are the app ID and app secret. You will need to click "Show" and enter your Facebook password to see the app secret.
Create or Update an Account
To create a new account, or update an existing one, please follow the following steps.
- Visit Settings -> Tickets -> Channels and click on the "Settings" link on the Facebook channel row. If you're creating a new account click "Add Account", or if you're updating an existing account, search for it and click the edit (pencil) icon on the right side of the table row.
-
Complete the input fields:
- Page Name - Enter the page name.
- Active - If the account is active and should be included when polling for new posts and messages.
- Page ID - The page ID found on the "About" tab on the Facebook page (See Setting up your Facebook Account For Access).
- Application ID - The app ID found on the application page (See Setting up your Facebook Account For Access).
- Application Secret - The app secret found on the application page (See Setting up your Facebook Account For Access).
- Import From - Lets the ticket importing start from a specified date, for example set to today's date to avoid any old posts and messages being imported. This option is only available for new accounts.
- Default Department - Select the department in which messages sent to this account should be opened as tickets in.
- Default Priority - Select the priority with which tickets opened by this account are set as.
-
Once all the details have been entered, click the "Get Access Token" button and you will be redirected to Facebook.
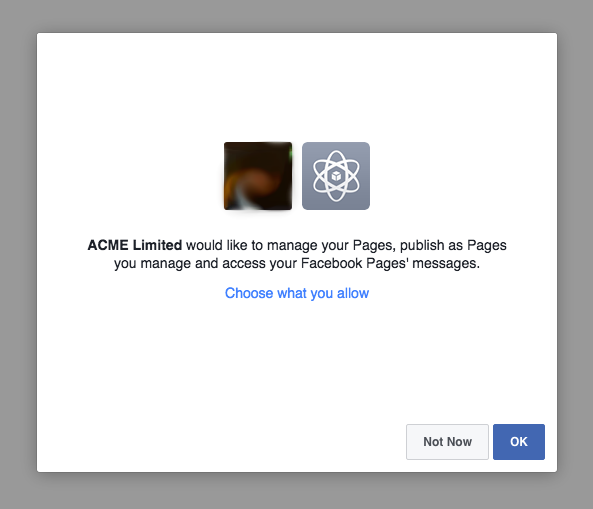
App RolesFollow through all the popups that are shown, which will just be making sure that you are allowing the application to post on the page's behalf. You will not have to change any of the permissions, simply press "OK" on each popup window as seen in the screenshots below.
Before clicking "Get Access Token" please ensure that your Facebook account is listed as an administrator or developer under "Roles" in the Facebook app dashboard. This allows you to request permissions without getting your app reviewed by Facebook.Information
Please disregard the big red "Submit for Login Review" error message and click "OK" to proceed with the wizard. This is not important provided you have read and acted upon the above "App Roles" note.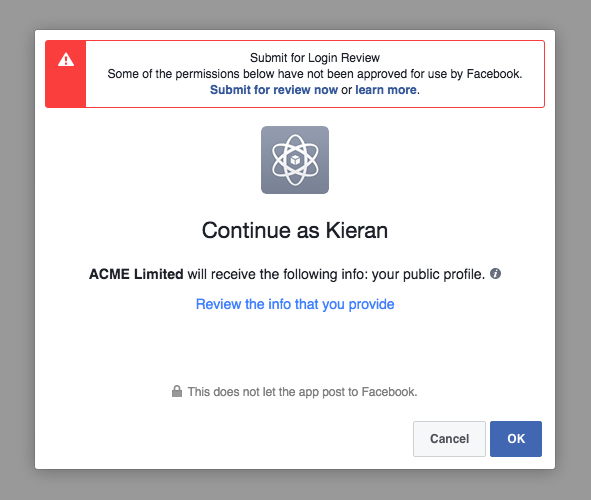

Finally you will return back to the help desk with an access token. - Click the "Submit" button to finish.
Delete an Account
To delete an account, follow the below steps:
- Visit Settings -> Tickets -> Channels and click on the "Settings" link on the Facebook channel row.
- Search for the account you wish to delete.
- Click the delete (cross) icon located on the right of the table.
- Click on the left button, "Yes, I'm sure", that pops up confirming you would like to delete this account and it will then be deleted.
Modifying the Polling Time
The active accounts are polled automatically by a scheduled task (See Scheduled Tasks). Edit the scheduled task to change the polling frequency and you can manually run the task to verify it's working.