# Quest K1000
Step 3 of the migration scripts expects a custom CSV file created by the K1000 reporting framework. Please follow the below steps for guidance:
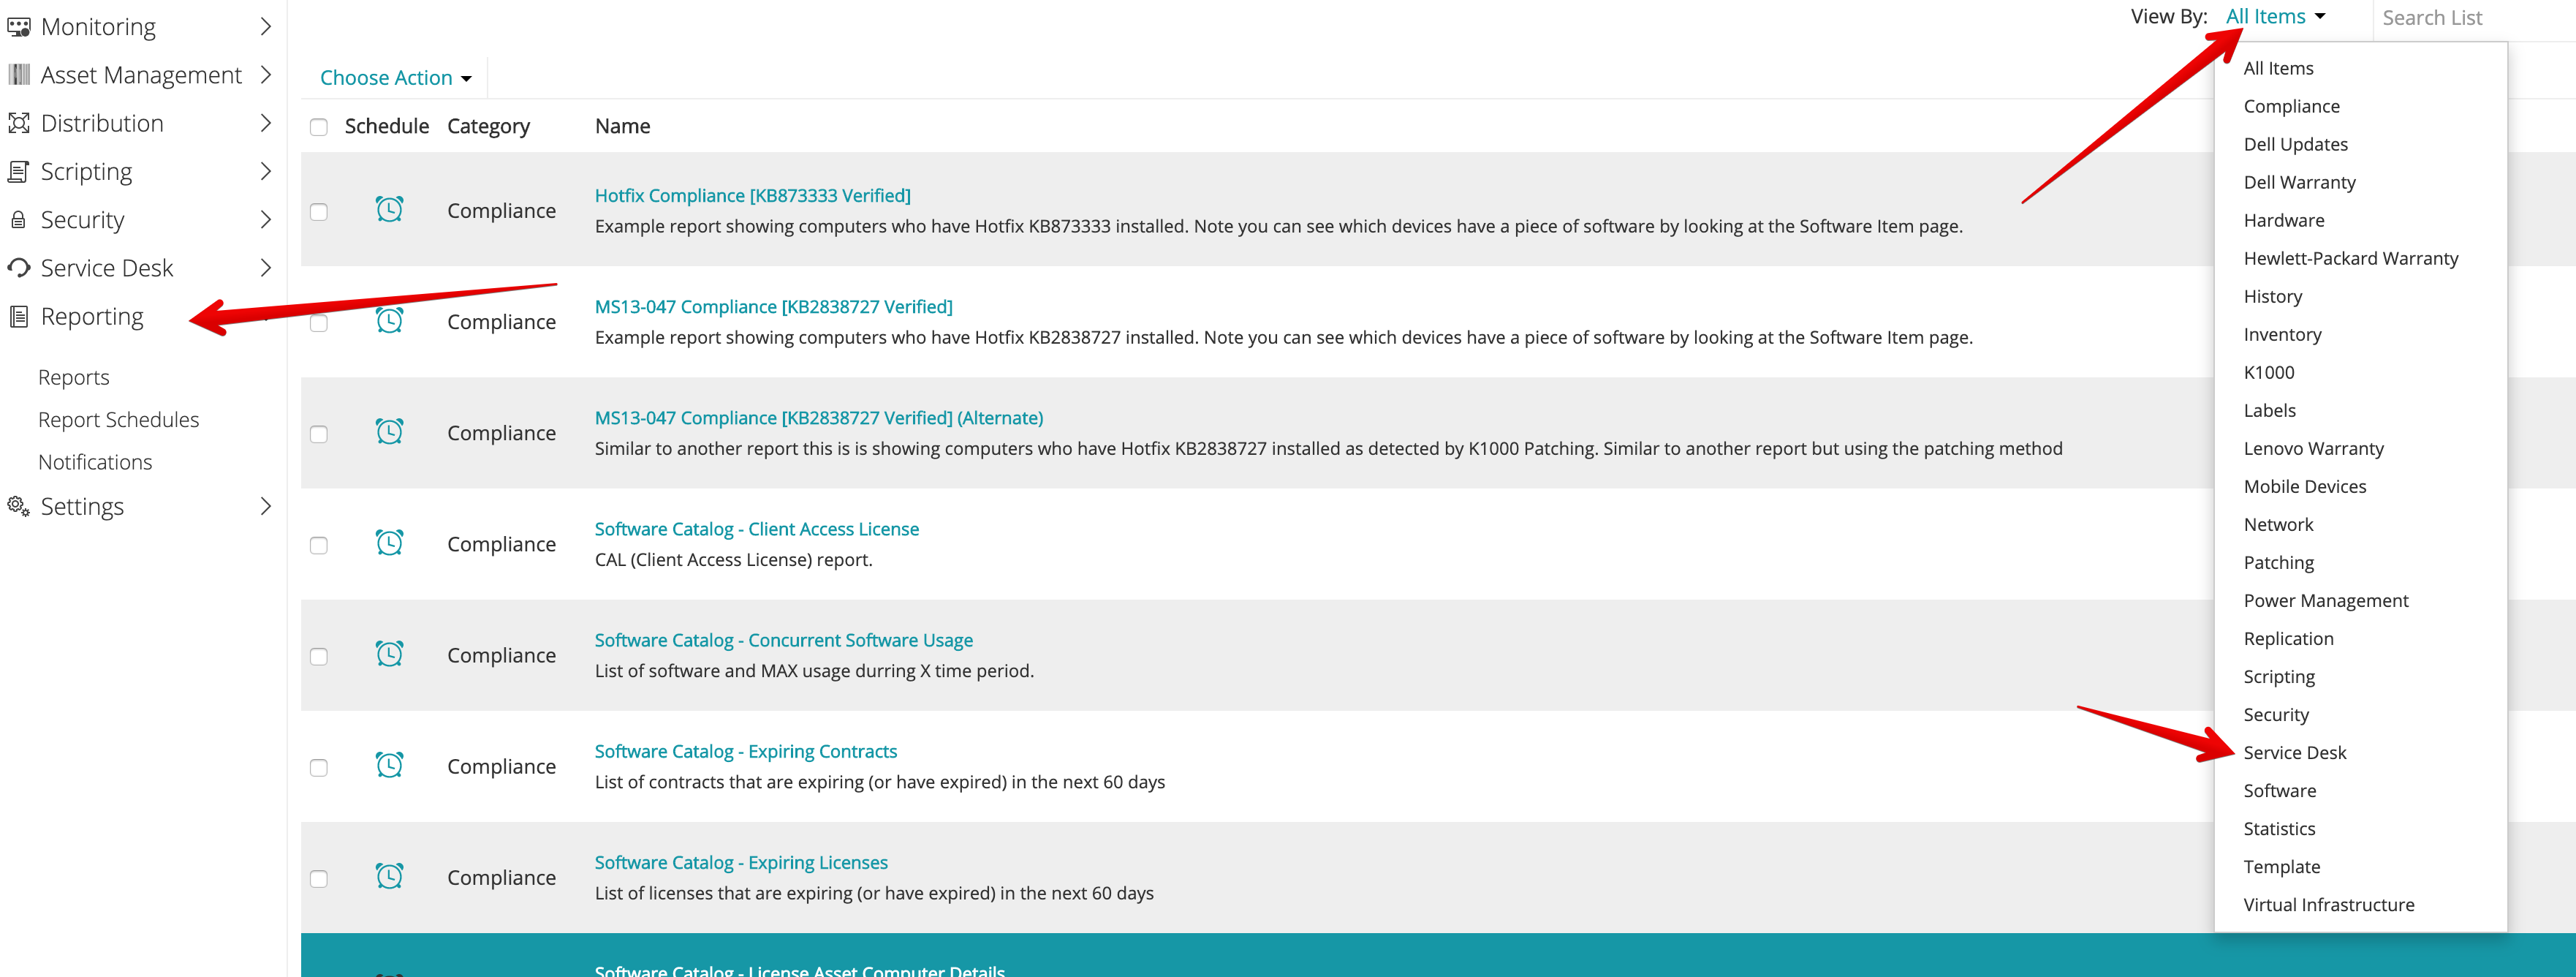
1. Open K1000 administrator interface, select `Reporting` in the sidebar, then select `Service Desk` under the `View By` filter.
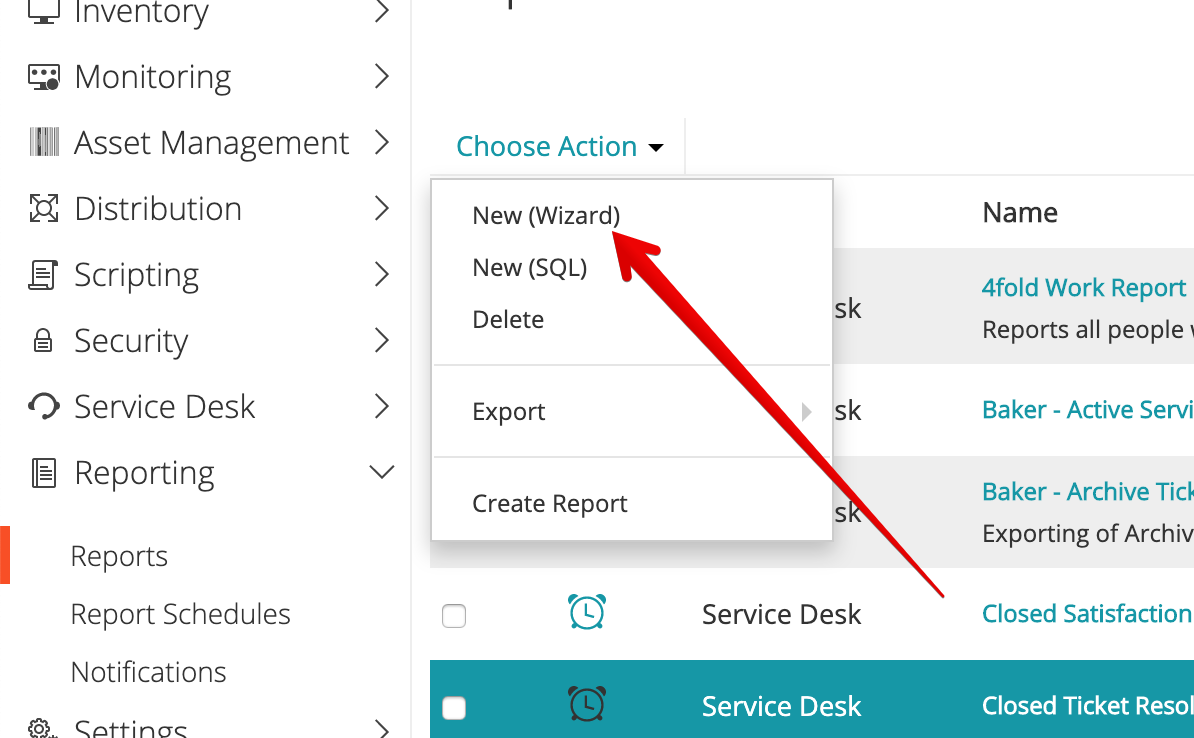
2. At the top of the table select `Choose Action` and click `New (Wizard)`.
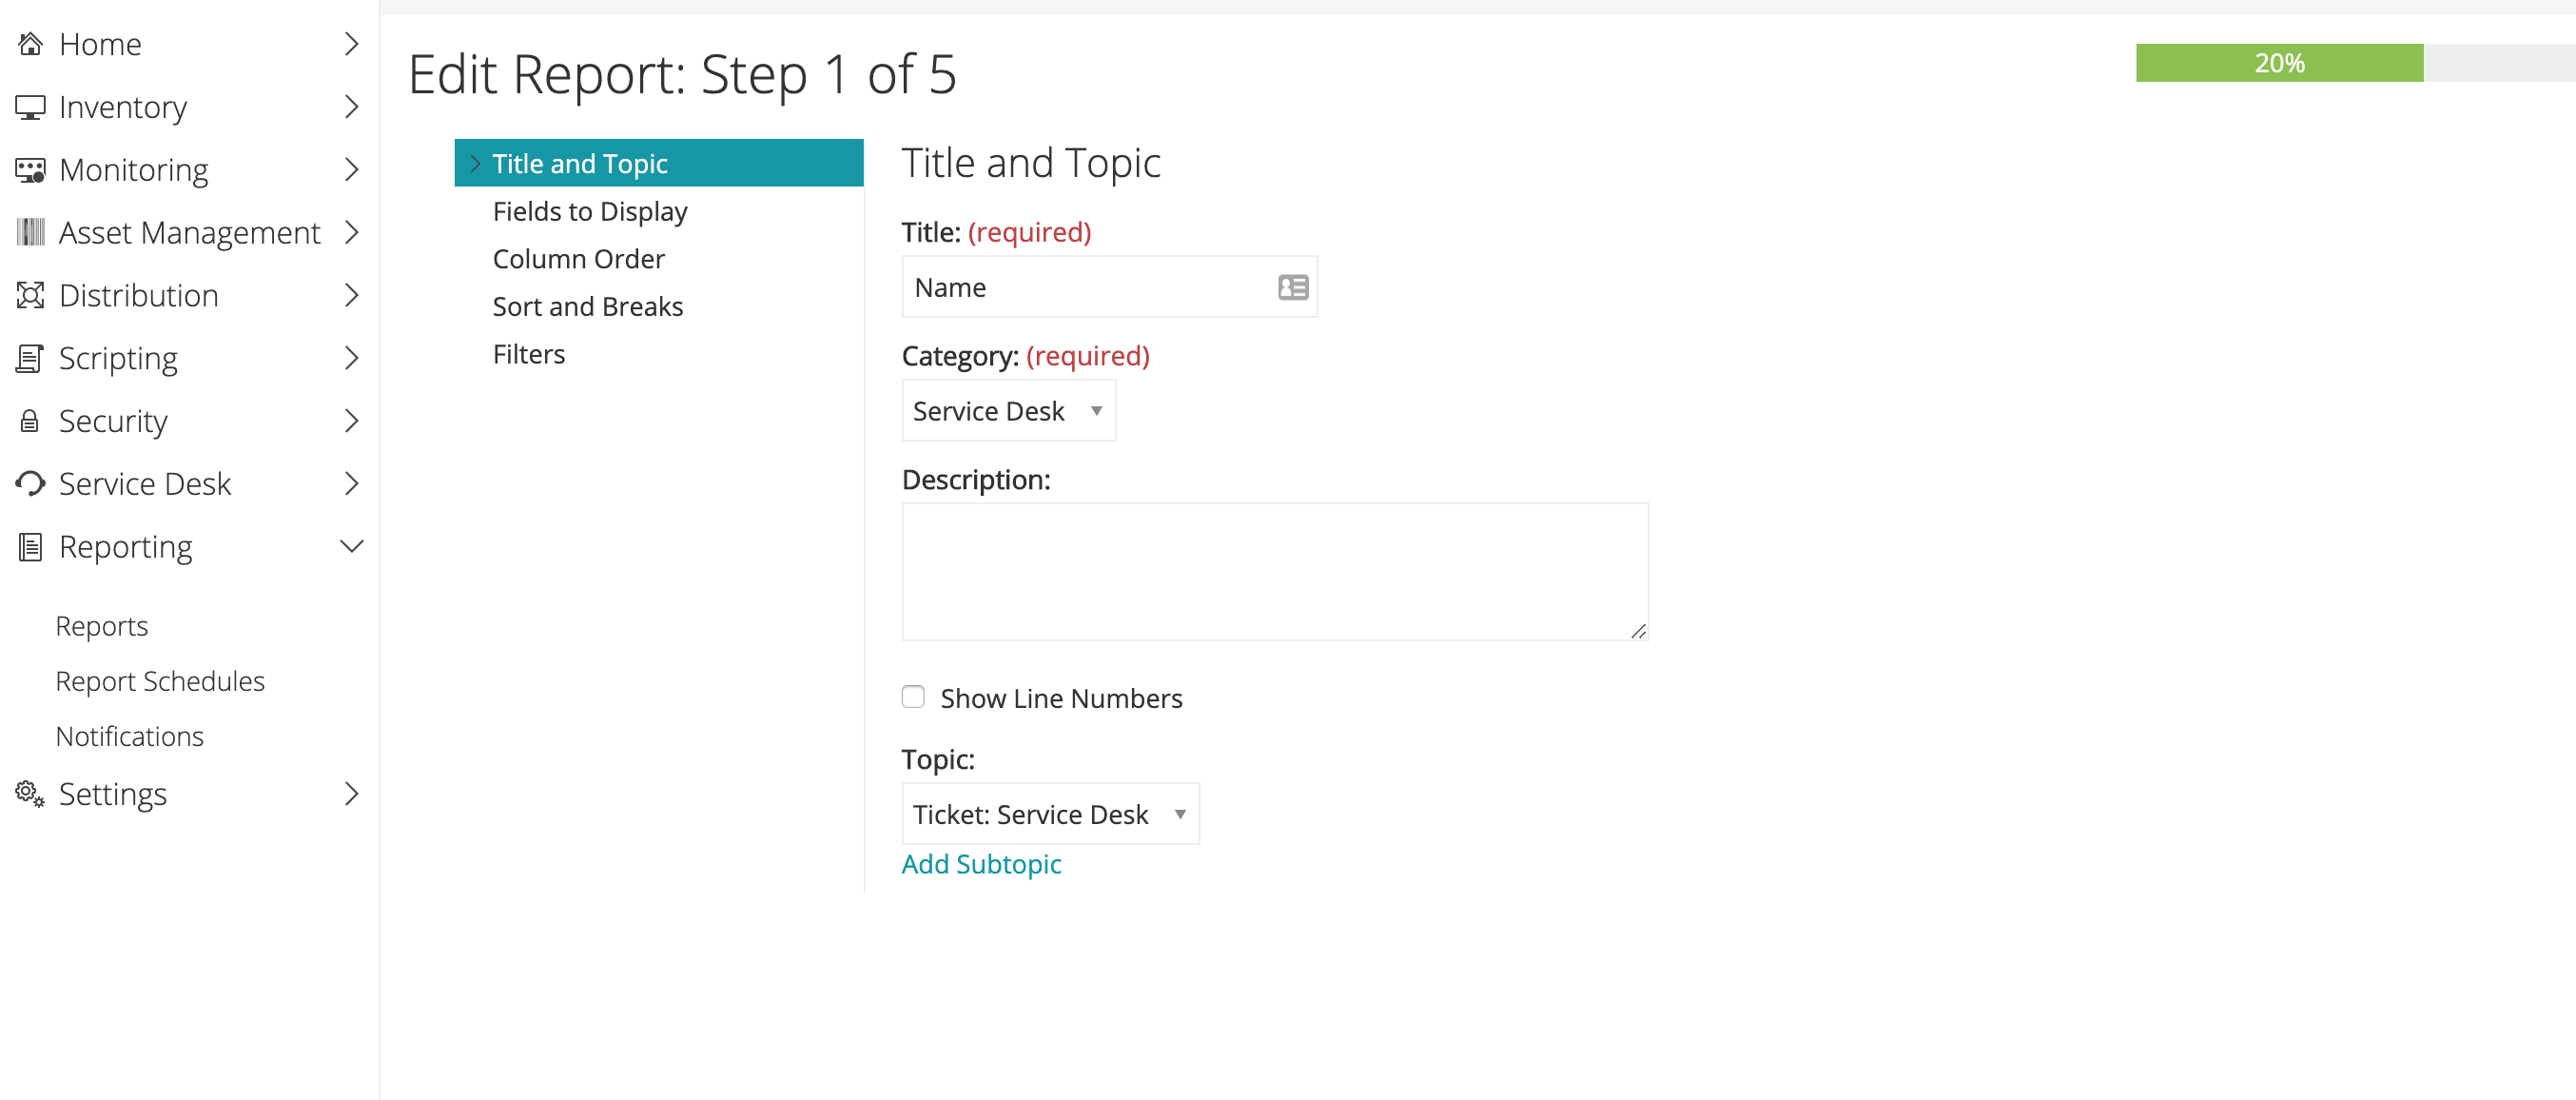
3. Enter a name for the report, select `Service Desk` as the category, and for under the topic menu search for `ticket`. Two options should be visible:
- `Ticket: The K1000 Service Desk`
- `Archive Ticket: The K1000 Service Desk`
The exact wording of these options may vary depending on your K1000 version (alternative wording shown in the screenshot below).
Select either of these options depending on whether you want to migrate active tickets or archived. If you would like to migrate both then you will need to do them separately.
4. For Fields to Display check `Ticket Info` and continue with the wizard. If you selected archive ticket above then check `Archive Ticket Info`.

5. Skip through the next few stages of the wizard by clicking `Next` until you hit the `Finish` button.
6. Once the report has been created, search for it in the table and generate a `CSV` report.