You're browsing the documentation for an old version of SupportPal. Consider upgrading to the [latest version](https://docs.supportpal.com/current/Google+Suite).
# Google Suite
Thanks to Tim Dawkings from [gigafy](https://gigafy.co/) for providing the below guide on how to use Google Suite as your SAML Identity Provider.
## 1. Add SupportPal user attributes to Google Suite
1. Go to the [Google Admin console](http://admin.google.com)
2. Choose **Users** from the hamburger menu in the top left
3. Once at the users screen, click the **Manage user attributes** button in the upper right
4. A modal will appear, click **Add Custom Category**
5. Enter the desired name (eg. Helpdesk, SupportPal)
6. Add an attribute for each of the SAML attributes in the SupportPal documentation that you wish to use. The attributes can have friendly names here, and do not need to match the system name.
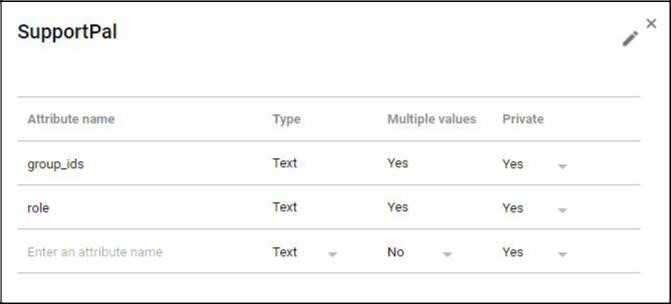
7. Update your individual user accounts, populating the new attribute fields as appropriate.
Custom attributes can also be added easily using Google's APIs instead of the Admin Console.
## 2. Add a SupportPal SAML App to Google Suite
1. Choose **Apps** from the hamburger menu in the top left
2. Click **SAML Apps**
3. Click the **+** button in the bottom right to add a new SAML application
4. Click on **Setup my own custom app** from the modal
5. Copy the `SSO URL` and `Entity ID` provided, and download the certificate file
6. Click on **Next**, and enter the application name (eg. SupportPal)
7. Check **Signed response**
8. Enter the `ACS Url` and `Entity ID` that corresponds to your SupportPal installation, see: [SAML Service Provider](SAML+Authentication#ServiceProvider)
9. In the **Name ID** section, choose `Basic Information`, and then `Primary Email`
10. For the **Name ID Format**, select `EMAIL`, then click **Next**
11. Click **Add new mapping**, and in the left column, enter the name of each of the SupportPal SAML attributes that you wish to use

12. In the right columns, choose the corresponding categories and fields from the Google user attributes
13. Click **Finish**
## 3. Update the SupportPal configuration
1. Create the file `/config/production/saml.php` in your SupportPal installation, according to the [documentation](SAML+Authentication).
2. Fill out the IdP configuration:
1. For the `entityID` value, use the `Entity ID` provided earlier by Google.
2. For the `singleSignOnService` url value, use the `SSO URL` provided earlier by Google
3. Because Google Suite do not support the singleLogoutService mechanism, for the `singleLogoutService` url value, you can use `https://accounts.google.com/logout`, which will ignore any posted data and logout the entire Google account when the user chooses to logout of SupportPal.
4. For the `x509cert`, paste the certificate that you downloaded earlier from Google.
If you have more than one brand in SupportPal, and users access the helpdesk using different URLs, you will have to create a SAML App in the Google Admin console for each brand individually.